
ESP Async WebServer is one of the most popular libraries for creating fast and responsive web servers on ESP32 and ESP8266 boards. It allows your device to handle multiple client connections without slowing down your program. While this library is powerful and efficient, securing your web server is just as important as building it. One simple security feature is blocking unwanted IP addresses.
If someone repeatedly tries to access your ESP web server or you only want trusted devices to connect, you can block specific IP addresses before they access your web pages. This guide explains how to block IP addresses in ESP Async WebServer using simple examples that even beginners can understand.
What Is ESP Async WebServer?
ESP Async WebServer is an asynchronous web server library designed for ESP32 and ESP8266 microcontrollers. Unlike traditional web servers, it processes incoming requests without stopping the rest of your program. This means your ESP can continue reading sensors, controlling relays, or performing other tasks while serving web pages.
Because of its speed and efficiency, the library is commonly used in home automation, IoT dashboards, smart lighting systems, weather stations, and Wi-Fi-based control panels.
Why Block IP Address?
Block IP address helps improve the security of your ESP project. If you notice repeated connection attempts from an unknown device or want to prevent certain users from accessing your web server, IP blocking is a simple solution. Block IP address
Some common reasons for blocking IP addresses include:
- Prevent unauthorized access.
- Stop repeated login attempts.
- Reduce unwanted traffic.
- Protect sensitive web pages.
- Improve overall network security.
Although IP blocking is not a complete security solution, it adds an extra layer of protection to your project.
How ESP Async WebServer Detects Client IP Addresses
Whenever a device connects to your ESP web server, the library automatically stores the client’s IP address. You can retrieve it using the remoteIP() function.
IPAddress clientIP = request->client()->remoteIP();This function returns the IP address of the device making the request.
Blocking a Single IP Address
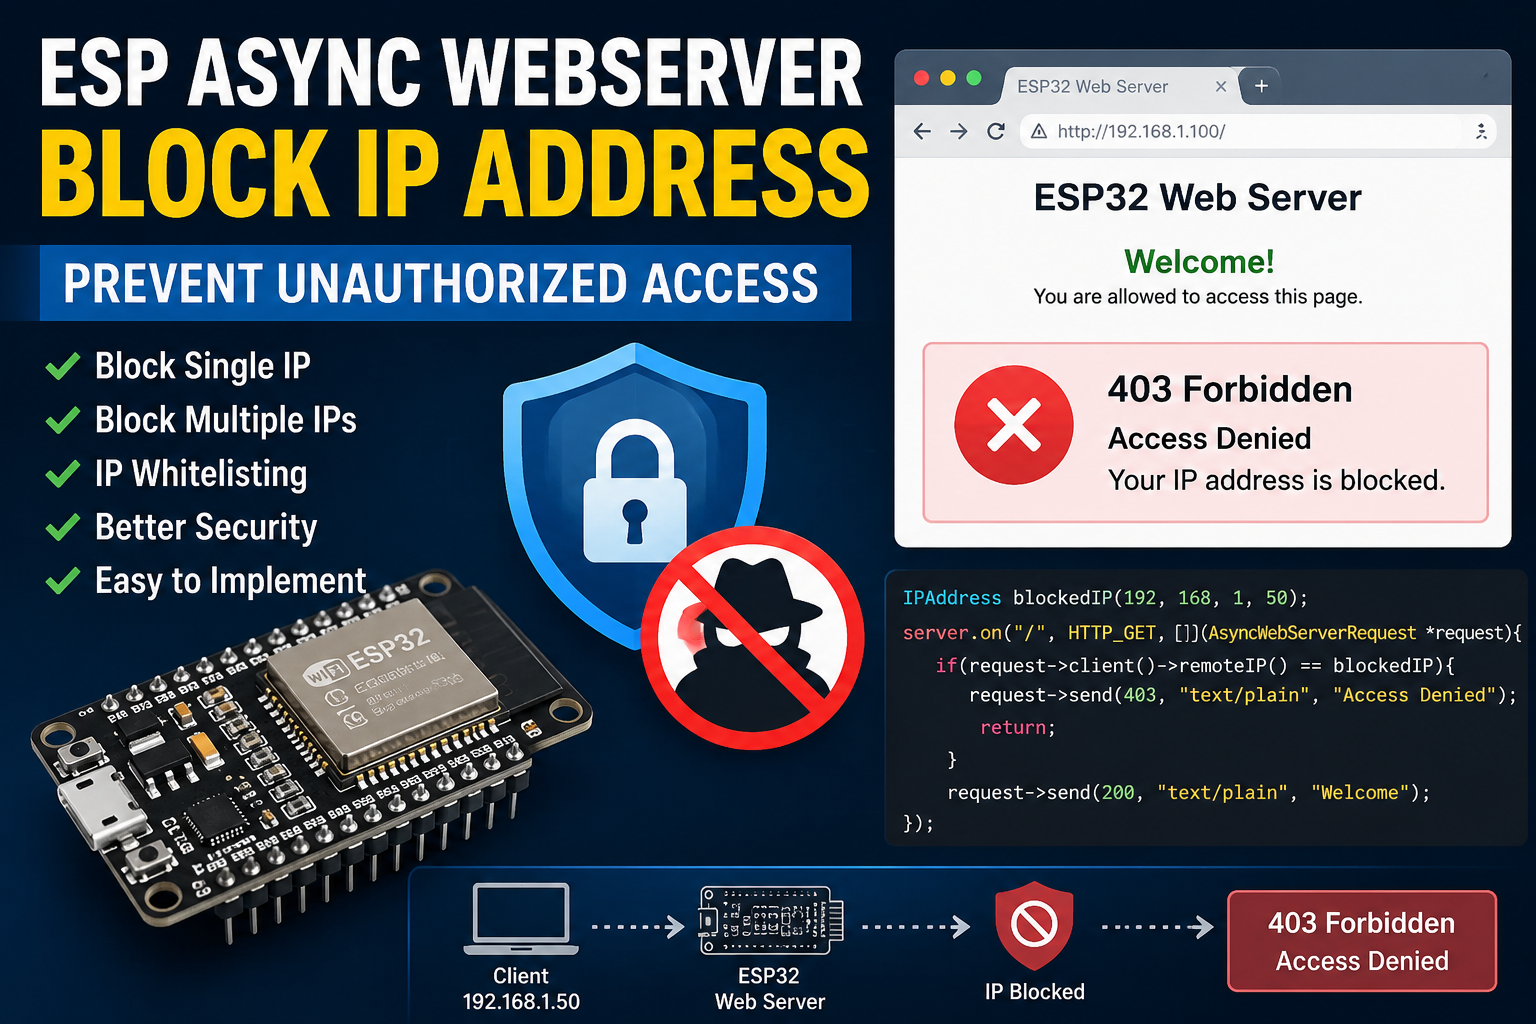
The easiest method is to compare the client’s IP address with a blocked IP.
IPAddress blockedIP(192,168,1,50);

server.on("/", HTTP_GET, [](AsyncWebServerRequest *request){

    if(request->client()->remoteIP() == blockedIP){
        request->send(403,"text/plain","Access Denied");
        return;
    }

    request->send(200,"text/plain","Welcome");

});
If the visitor’s IP address matches the blocked IP, the server responds with an HTTP 403 Forbidden status.
Blocking Multiple IP Addresses
If you want to block more than one device, store the IP addresses in an array.
IPAddress blockedIPs[]={
    IPAddress(192,168,1,20),
    IPAddress(192,168,1,50),
    IPAddress(192,168,1,100)
};
Next, create a helper function.
bool isBlocked(IPAddress ip){

    for(int i=0;i<3;i++){

        if(ip==blockedIPs[i]){
            return true;
        }

    }

    return false;

}
Use this function before sending your web page.
server.on("/",HTTP_GET,[](AsyncWebServerRequest *request){

    if(isBlocked(request->client()->remoteIP())){
        request->send(403,"text/plain","Blocked");
        return;
    }

    request->send(200,"text/plain","Access Granted");

});
This method is much cleaner when managing several blocked devices.
Allow Only Trusted Devices
Instead of blocking unwanted users, you can allow only one or more trusted IP addresses. This approach is known as IP whitelisting.
IPAddress allowedIP(192,168,1,10);

if(request->client()->remoteIP()!=allowedIP){
    request->send(403,"text/plain","Unauthorized");
    return;
}
Whitelisting is often more secure because every unknown device is automatically denied access.
Display the Visitor’s IP Address
During testing, it is useful to see which devices are connecting to your ESP server.
Serial.print("Client IP: ");
Serial.println(request->client()->remoteIP());
The Serial Monitor will display each client’s IP address, making it easy to identify devices on your network.
Logging Blocked Requests
Keeping a log of blocked devices helps with troubleshooting and security monitoring.
IPAddress ip=request->client()->remoteIP();

if(isBlocked(ip)){
    Serial.print("Blocked IP: ");
    Serial.println(ip);
    request->send(403,"text/plain","Forbidden");
    return;
}
Whenever a blocked device tries to connect, its IP address is printed in the Serial Monitor.
Block IP address
Blocking an Entire Network
You can also block every device from a specific subnet.
IPAddress ip=request->client()->remoteIP();

if(ip[0]==192 && ip[1]==168 && ip[2]==1){
    request->send(403,"text/plain","Network Blocked");
    return;
}
This blocks all devices with IP addresses beginning with 192.168.1.x.
Block IP address
Preventing Too Many Requests
Some users may repeatedly refresh your web page or send hundreds of requests in a short period. You can count requests from each IP address and temporarily block devices that exceed a limit.
This technique helps reduce spam and provides basic protection against simple denial-of-service attacks.
Common Mistakes
Many beginners make small mistakes when implementing IP blocking.
One common mistake is blocking your own computer. Always verify the IP address before adding it to the blocked list.
Another issue is forgetting to use the return statement after sending a 403 response. Without it, your program may continue executing and accidentally send the requested page.
Finally, remember that many home routers assign dynamic IP addresses. A blocked device may receive a new IP address after reconnecting.
Best Security Practices
IP blocking works best when combined with other security methods.
Follow these best practices:
- Use strong usernames and passwords.
- Enable authentication for sensitive pages.
- Log blocked connection attempts.
- Update your firmware regularly.
- Allow access only to trusted devices whenever possible.
- Avoid exposing your ESP web server directly to the internet.
- Use HTTPS or a secure gateway when available.
Combining multiple security methods provides much stronger protection than relying only on IP filtering.
When Should You Use IP Blocking?
IP blocking is useful in many ESP projects, including:
- Home automation systems.
- Smart door locks.
- IoT dashboards.
- Relay control panels.
- Sensor monitoring systems.
- Industrial automation.
- Wi-Fi-based lighting control.
- Weather stations.
Any project that should only be accessed by trusted users can benefit from IP filtering.
Block IP address
Conclusion
Block IP addresses in ESP Async WebServer is an easy and effective way to improve the security of your ESP32 or ESP8266 web server. By checking the client’s IP address before processing a request, you can prevent unwanted devices from accessing your application. Whether you choose to block individual IPs, multiple addresses, or entire networks, the implementation is simple and requires only a few lines of code. For the best protection, combine Block IP address filtering with authentication, request logging, and other security practices to keep your IoT project safe and reliable.
Frequently Asked Questions
Can ESP Async WebServer block IP addresses?
Yes. You can compare the client’s IP using request->client()->remoteIP() and deny access with an HTTP 403 response.
Does this method work on ESP32 and ESP8266?
Yes. ESP Async WebServer supports IP filtering on both ESP32 and ESP8266.
Can I block multiple IP addresses?
Yes. Store the blocked IP addresses in an array and compare every incoming request with that list.
Is IP blocking enough to secure my ESP web server?
No. IP blocking should be combined with authentication, secure passwords, and other security measures.
Which HTTP status code should I use for blocked users?
The recommended status code is 403 Forbidden, indicating that the client is not allowed to access the requested resource.
Block IP address